Member Settings
The following image shows the Member Settings page.
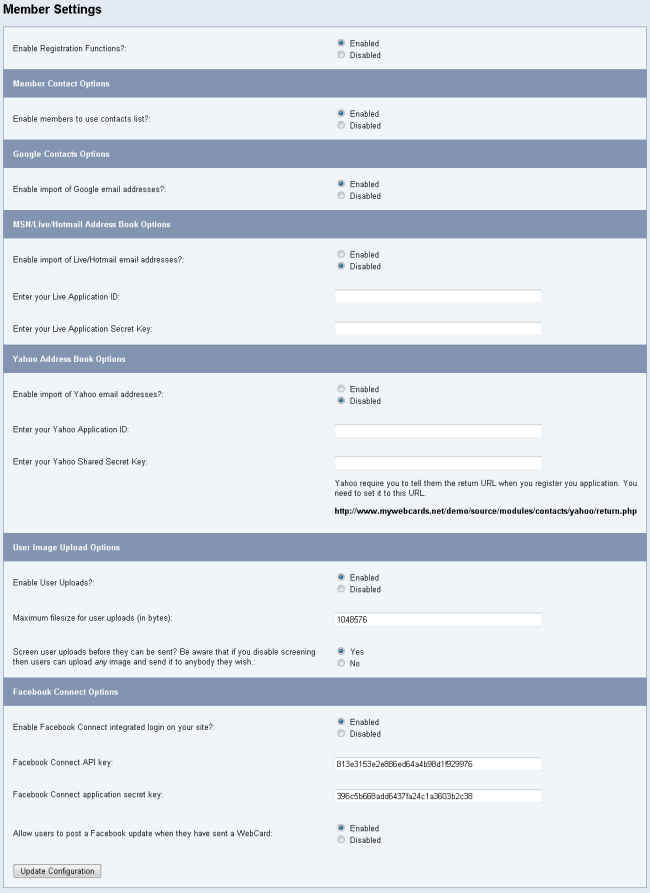
Enable Registration Functions?
You are able to totally close down all member- and registration-related functions on your WebCards installation.
Enable Members To Use Contacts List?
This option allows you to enable and disable your members’ address books. Disabling this option will disable all address book options.
Enable Import of Google Email Addresses?
Do you want your users to import their contacts from their Google account? No configuration or registration is required to use this option.
Enable Import of Live/Hotmail Email Addresses?
If you enable this option you must register with Live for an application ID.
Register at the Windows Live Application Management
Log in with your Windows Live ID and click “Add An Application” in the top left corner
Enter your website name, choose “web application”, and enter the domain of your WebCards installation. Click “I Accept”
You will be presented with your Client ID and Secret Key. These are the details you need to enter to enable your users to import their Live contacts into WebCards. However, you must complete a few more steps before the details are activated. Click “Essentials” to get started
You need to verify your domain by uploading a text file. Click “verify now” and follow the instructions to complete verification
Next you are required to enter the return page URL, home page URL, terms of service URL, privacy URL and support URL. It will work if you just put your homepage URL for all of these. Click “Save” to continue
Next visit the “Text and Logos” tab. You will need to enter a description and 3 different logos that fit the stated size requirements. They all must be in gif format. They will be included on the login page so will allow a certain amount of customisation. The logos are required to continue. Click “Save” to upload the files
Finally, click on the “Application Status” tab, check the box and click “Publish”. Once all these steps have been completed, your credentials will be activated
You must fill in your Client ID and Secret Key to allow your users to import their contacts from Live. Once you save your settings, the appropriate configuration file will be created for you. If there are any problems with this file you will be notified.
Enable Import of Yahoo Email Addresses?
If you enable this option you must register with Yahoo. Be careful when you register as it can be a little tricky to get all the settings correct.
Register at the Yahoo Developer Network
You will probably have to login with your Yahoo ID
Set authentication to “Browser Based Authentication”
Fill in your company name and product name
In the “Web Application URL” box enter your WebCards URL. For example http://www.example.com/webcards/
You can find the “BBAuth Success URL” value in this section of your Administration Center. It is important you set this value correctly. For example, our demonstration version uses a value of http://www.mywebcards.net/demo/source/modules/contacts/yahoo/return.php. Yahoo requires you to state the return URL in advance. If you make a mistake setting this value your users will be redirected to the worng page when they import their contacts
Enter your contact email and a description
Under “Required access scopes” check the “Yahoo! Address Book with Read Only access” box
You must fill in your Application ID and Shared Secret Key to allow your users to import their contacts from Yahoo.
Enable User Uploads?
This setting allows you to let users upload their own images to send in WebCards. If uploads are disabled, all the other settings below are irrelevant.
Maximum Filesize For User Uploads?
This setting restricts the size of images users are allowed to upload. The figure is in bytes so 1MB is 1048576 bytes.
Screen User Uploads Before They Can Be Sent?
If you allow users to upload images it might be a good idea to screen all these images before they can be sent. When a user uploads an image you will be sent an email notifying you there are images to authorise. When you accept or deny the image, they user receives an email letting them know.
It is only advisable to screen uploads if you are able to review them quickly, as your users may become frustrated if they have to wait.
Facebook Connect Options
Facebook Connect is a fantastic way to increase the number of registrations on your WebCards installation. Enabling it means users can link their Facebook account to their WebCards account. They can login using their Facebook username and password. It also means they don’t have to maintain two separate usernames and passwords.
You can register your application at Facebook.com/developers/ in order to get API credentials. You will need to insert your Facebook API key and application secret into the appropriate fields in this setting.
We have full instructions in how to register your website to integrate with Facebook on our Facebook Connect documentation.
Click “Update Configuration” to save your changes.